You can add as many borders as you like to your layers, with different thicknesses, colors and blend modes.
On this page
Borders can be a solid color , or have a linear
, radial
or angular gradient
fill.
Tip: You can quickly show or hide borders on any layer by pressing B.
How to set a border position
For closed shapes, you can place borders on the inside , outside
or center
of its outline. For open paths, the only option is center.
Border options (left to right): Inside, Center, Outside.
How to customize borders
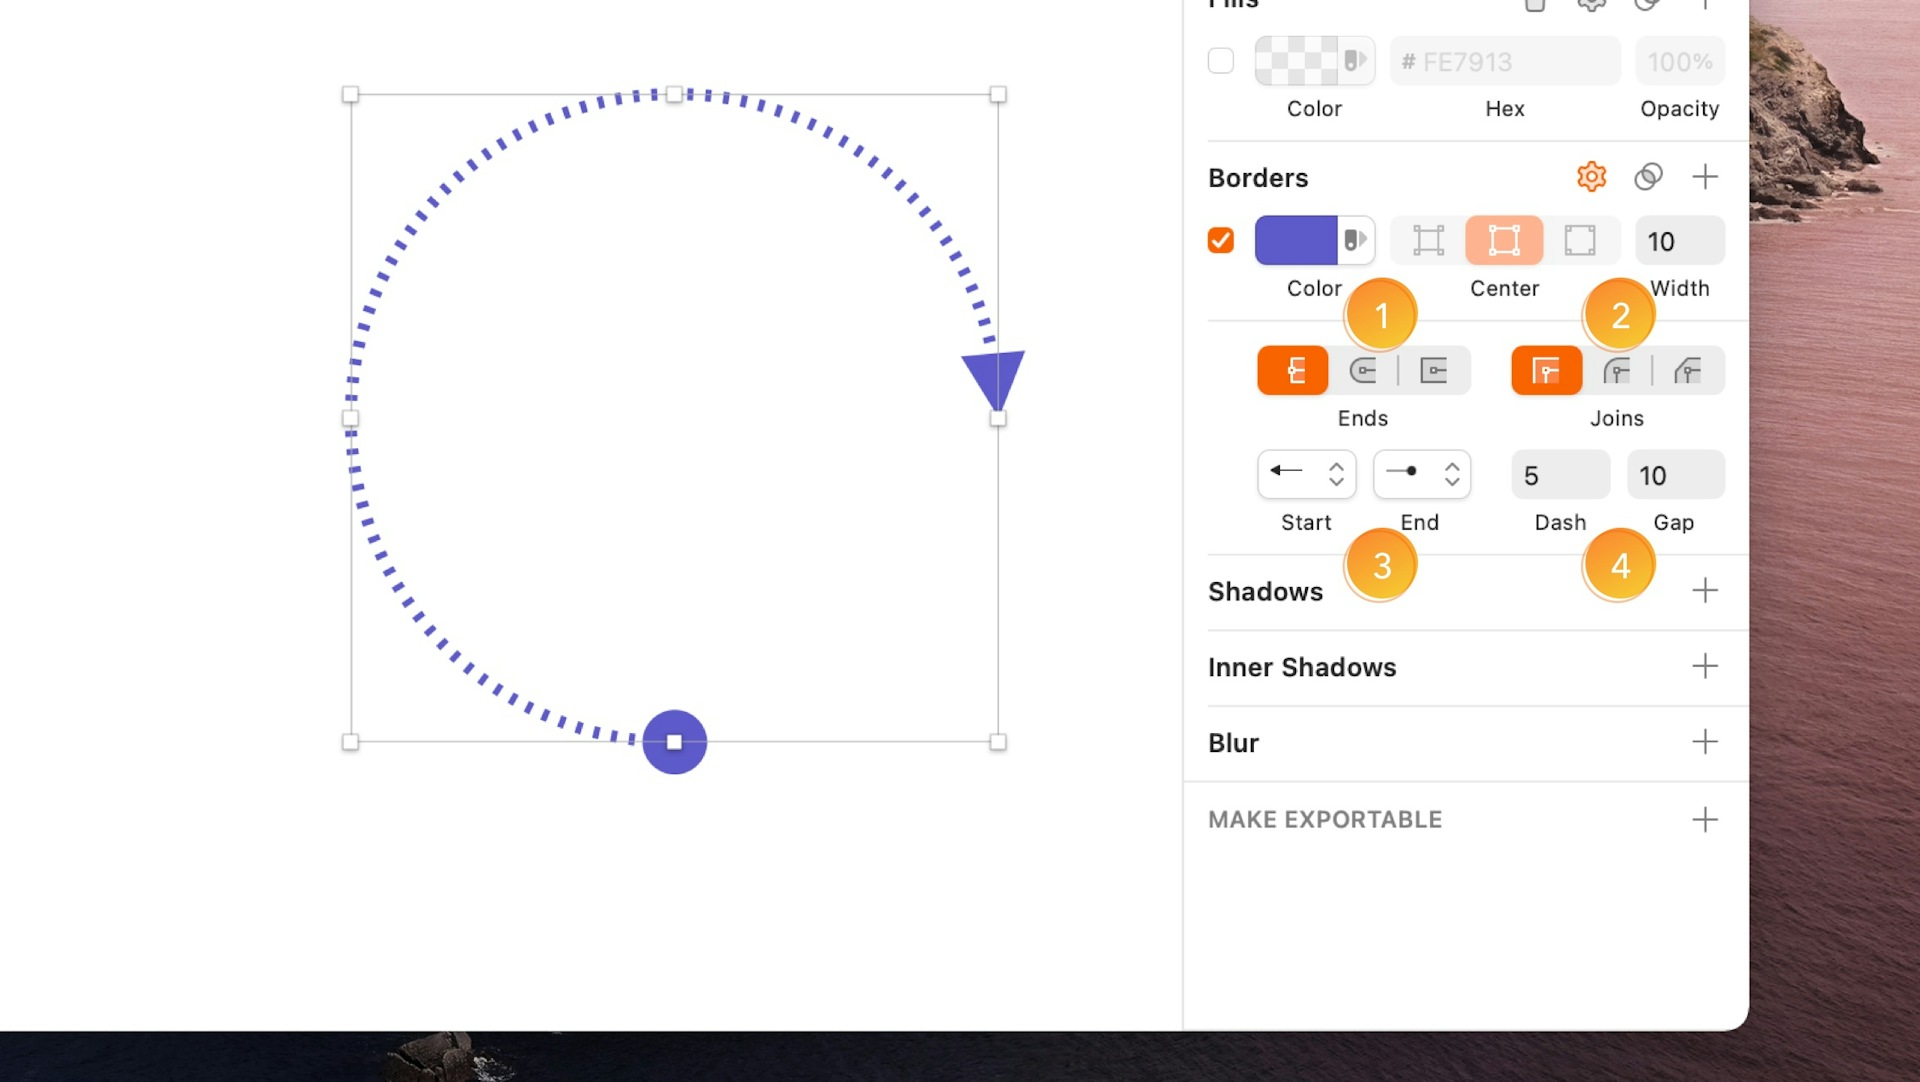
Click the settings icon next to the Borders title to bring up options for caps, ends, arrows and dashed borders:

-
For line layers and open paths, you can choose from three types of border end: Butt cap
(Draws the border right to the vector point), Round cap
: (Creates a rounded, semi-circular end to a path that extends past the vector point) or Projecting cap
(Similar to the rounded cap, but with a straight edges).
-
For open and closed paths with three or more points (creating corners) you can choose from three types of join: Miter join
: (Creates an angled join), Round join
: (Creates a rounded corner for the border with a radius relative to the border thickness) or Bevel join
(Creates a chamfered edge on the border corner).
-
For line layers, you can choose arrowheads for the start and end of the path using the drop-down menus. To switch which ends they appear on, choose Layer > Path > Reverse Order.
-
To create dashed lines, enter a value in the Dash field to set the length of the dashes. The Gap field, which sets the distance between dashes will automatically match this unless you set it to something different. To reset the the Gap value and have it match again, delete anything in that field.
Tip: To create a dotted line, set the end type to a round cap , then set the dash value to 0. Adjusting the gap distance will change the look of your dotted border.
